Showing posts with label SAE. Show all posts

Saturday, March 9, 2019

Cavalry for 30mm Wargames

      A while back I bought some gilt painted cavalry figures to use with 40mm wargames. After getting them,  I realized that they were closer to 30mm to 35mm. Still, as my 40mm armies were to be "toy soldier" armies, the difference in scale wasn't going to bother me.

      However, I have been working towards using 30mm Swedish African Engineer figures for my next project. I think the cavalry figures will work fine with the SAE miniatures. They are a little larger than SAE cavalry figures, but not much that they would distract from the game. Looking at the classic wargame  book, "CHARGE!" by Peter Young and J.P.Lawford, it seems they ran into the same scale problem with their cavalry. So if it's good enough for these two wargaming pioneers, it's good enough for me.

The lot of gilt cavalry. I did a posting on them when I first received them.

The cavalry next to a 40mm figure.


The gilt cavalry next to SAE figures. While the SAE is smaller than the gilt, it's a difference I can live with.

I have been trying to figure out the make of the gilt cavalry. It seems the different British manufacturers all painted some of their figures gilt, so that didn't help me in my search.

Sunday, March 3, 2019

Another Mold to Distract Me

      As I made my last mold, I noticed that the rubber was getting low, but it also seemed to be solidifying. I'm not sure if it was because it had been in the cold basement, or was reaching the end of its shelf life.  I decided to use the last of it quickly. I brought the rubber upstairs to warm up.  My choices for a figure was either a SAE British Colonial infantryman advancing, or a SAE British infantryman charging.  I have long disliked figures charging, with one leg kicked back high in the air; perhaps because of my disappointment with Esci's Zulu War infantryman with the exaggerated charging position.  However, the picture that inspired these molds shows infantrymen in this charging position. And so the mold was made of the charging infantryman.
The original inspiration for the last two molds.

The completed figures. There is a groove down the front of the helmet that isn't visible in the picture. If these figures ever get any serious use, those grooves would need to be filled.

The figures in roughly the same position as the Little Wars drawing.

Perhaps now that these molds are completed and figures poured, I can go back to the project I was working on before my "midnight madness" distracted me.

Tuesday, February 19, 2019

And Now, a Successful Mold

       It's weird what I think of when I wake up in the middle of the night. This night I woke up thinking of SAE figures and how to use them for Little Wars. There is one line in my first copy of Little Wars: " His fire met my advance, littering the gentle grass slope with dead,..." and next to this line, one of J.R.  Sinclair's margin drawing of what looks like Boer War British infantry charging through a barrage of wooden shells that inspired my next mold. I have some SAE British Colonial infantry that are painted with the traditional red coats and with pith helmets. I decided to try to mold one of these figures that I could paint as Boer War infantry.

    Next day I went to work on the mold using the same procedure mentioned in the last post. Below is the result.
The master after pouring the first half of the mold.

Start of production.

Fresh out of the mold. At this point I would put the mold back together and pour another  casting. Then I cut the pour spout off and return it to the pot; file down the base, and trim any flashing off the figure. By this time the next figure can be removed from the mold.


Some of the casting next to the master.  

Sunday, February 10, 2019

New SAE Recruits

       I have been looking back at my blog and liked the look of the SAE wargames I've had. As I haven't done much with the hobby, I thought I would work on my SAE ACW figures. My collection have more Confederates than Union, so I decided to switch some of the Rebels to Union men.

    The only ACW cavalry figures I have are broken off their bases, and no artillery figures. I started to  look on Ebay for cheap cavalry figures. While going through the sales, there was a photograph of 11 SAE British Guards. The price wasn't bad so I started watching them. As the time was running out, I realized that there were more figures in this lot. There were a total of 34 figures total. The rest were WW2 figures painted like British 19th century soldiers. I bid and won the lot. One reason I wanted these figures was there were 4 figures that looked like they might  be Viet Cong figures. When I received them, I realized that they're British WW2 figures. And while I thought the rest were American figures, one is a WW2 German figure. All in all,  at .76 cents per figure, it was a great purchase.
New SAE Union recruits

The SAE ACW figures divided. These don't include Zouave figures that I have.

The newly purchased SAE figures.

The. WW2 figures of the lot.

The 4 British figures. I really like the mortar man.


The German infantryman with the Brits in the background.

Sunday, November 4, 2018

SAE Figure Conversion

   One reason I want to work on sculpting is so I can produce 19th century American militia units. While looking at Battle Game of the Month blog for inspiration, I was trying to decide what scale of figures to use for this project. As I have a sizable collection of SAE 30mm ACW, 30mm would be my next project. While looking at some Kinney Militia cigarette cards, I got the idea of converting some of the figures using "green stuff" instead of trying to create my own. 

    For the first attempt I decided to use a recast SAE British Guards figure. I trimmed down the front of the coat, added "swallowtails" to the back of the coat, converted the boots to trousers, and added epaulettes to the shoulders. I did this hurriedly before leaving for a couple of days. When I got back in town, I threw a quick coat of paint on the figure to see the results.  I am happy with the result; although hopefully with more practice my work will improve. I also have to  make the time to do such work.


SAE figure with trousers, swallowtails, and epaulettes added.

Front view with coat front trimmed off.


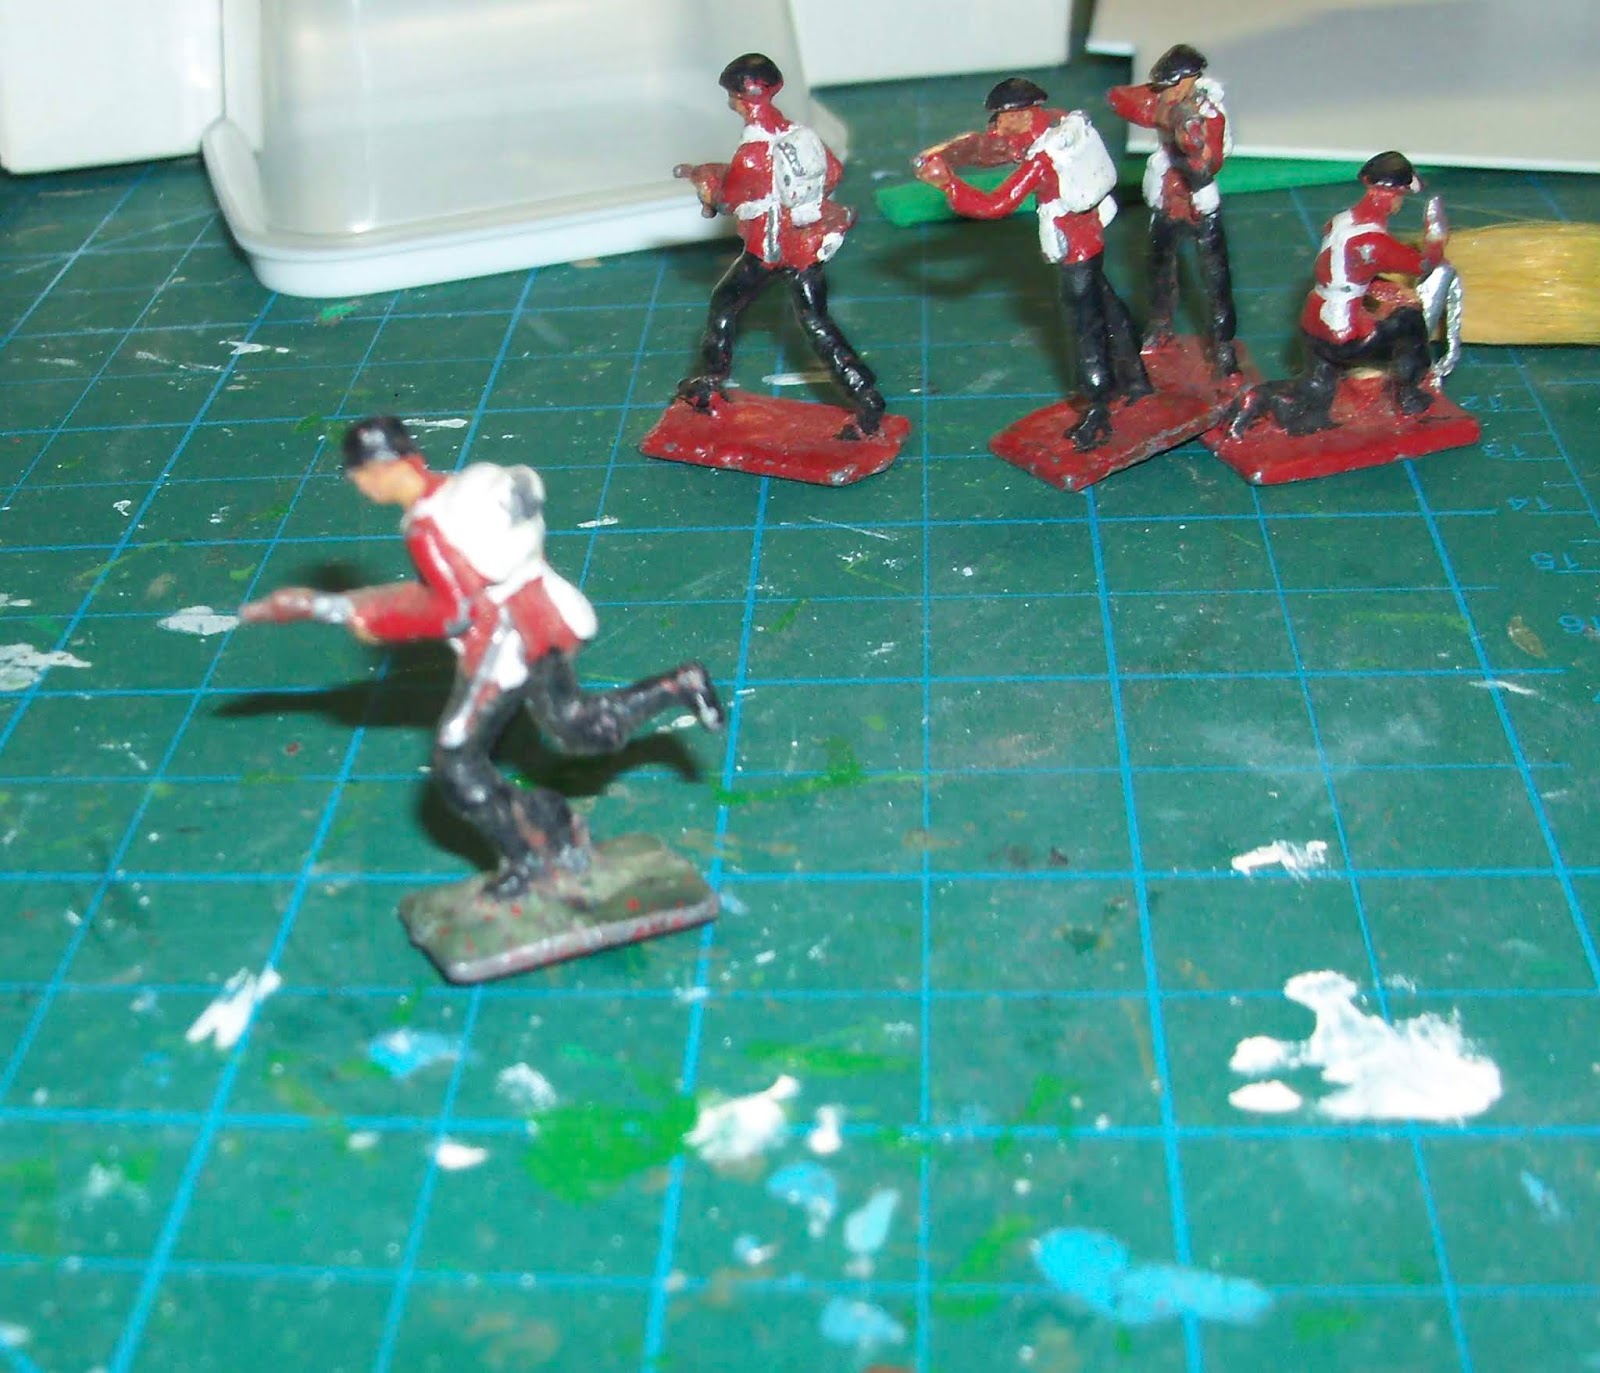
Figure with a quick paint job to see the results.  
I'm happy with the result, considering it's my first attempt at conversion using "green stuff".
My next goal is to find my collection of Kinney militia cards, which I have managed to misplace (hopefully I didn't accidentally throw them out!)

Sunday, November 12, 2017

Pursuit of the Blue Army: a SAE Wargame

      With the Blue Army in full retreat, General Higginbottom started a rather casual pursuit. With a fresh militia regiment joining his force, Higginbottom turned the pursuit over the the militia commander. He also gave two companies of his grenadiers to the force. The blue force shouldn't be in any condition to rally.
     However, what Higginbottom didn't know is the Blue army received reinforcements of two companies. The blue commander found a nice ridge line to rally his force on and to turn and fight the Red army.
The red army prepares for battle.

The blue army take position on a ridge line. The new reinforcements, the grey battalion, takes the right flank. The blue commander keeps one company in reserve behind the ridge line.

The red army advances piecemeal.


The blue artillery opens fire, and drives one company of militia back.

The blue commander sends three companies forward to try to disrupt the red advance.

The red artillery opens fire and hits the company in front of it.

The blue continues to charge. A fourth company joins the blue charge.

This blurry photo shows the lay of the land during the game; the ridge line doesn't show with the flash of the camera.


The red fire forces two blue companies to retreat.

The blue army continues their attack. The blue commander brings up his reserve company onto the ridge.


The grey troops go right in at the militia.


The red left flank suffers a disastrous turn. One red company is wiped out, and the other company turns tail.

The red army is in a precarious situation.

The red commander shifts his left flank troops towards the center, and refuses the flank (always wanted to say that after seeing "Gettysburg"!) 

The red left flank is stabilized, and the artillery fire drives back another blue company.


The grey companies still inflect heavy losses on the militia, but they hold firm. One grenadier company breaks, but another company moves forward to their aid.

The red center moves forward...

...and the left companies put the grey companies to flight.


The militia overrun one grey company.

The blue army counterattacks.

One militia company breaks and runs.

Things seemed to turn to blue's favor.

However, once again, the red line stabilizes.

The combined fire causes heavy casualties amongst the blue forces.

The blue army decides to withdraw before their losses are too great.

The red army line at the end of the game.

This game gave me an opportunity to show off some more of the SAE clonal British figures I have. I should have put those figures closest to the camera, however, this game was quickly put together.