Saturday, December 28, 2019

Over Complicating No Brain Wargame

     At work I was trying to think of ways to make No Brain Wargame  more challenging, without making it more complicated. Among different ideas was to add terrain, have the armies unequal, and add new combatants.

     To make the armies unequal, once both sides have their base armies (16 spearmen, 8 archers, one general), both sides roll one 6D. They then get to add that many points to their army (spearmen=1, archers=2). First practice roll one side got a 1. This meant that they would have one lone spearman on a square. I figured that this lone figure would be left behind, as I would not want to waste a move when there are larger units. My solution was to allow trading in one of the 16 spearmen in and draw another archer.

   As for terrain, I decided to start with hills. I came up with an overly complicated rule, which I won't even bother trying to explain. Using it for the first time, the side that would have to attack it chose instead to avoid the problem completely, as there was a strong force of archers on it and an attack would be suicide.

   My third idea, new combatants, was to add "warriors" to the game. On the additional troop dice roll, a warrior could be purchased for each 3 rolled.  One side rolled a 3, and added a warrior to their army. Once again, the rules involving warriors became complicated; what's more in the game the warrior turned out to be Arnold Schwarzenegger as Conan, holding off 3 units that ended up battling this one figure. The warrior was finally dispatched, but it slowed the game down too much. I decided that the rules for the warrior didn't work.

 Besides complicated rules, I made the mistake of trying all three new rules in one game. As the game started, one side had a warrior which proved to be too powerful for the game,  as mentioned above. And as I said before, there was no attack on the hill.

   After the game I did play out an attack on the hill and decided the rules I came up with didn't work. Over the last couple of days I did come up with other rules regarding hills and warriors. I will try each rule in a separate game in which only one rule will be played. I did play a couple of games with the addition of figures based on rolls and have been happy with the results.

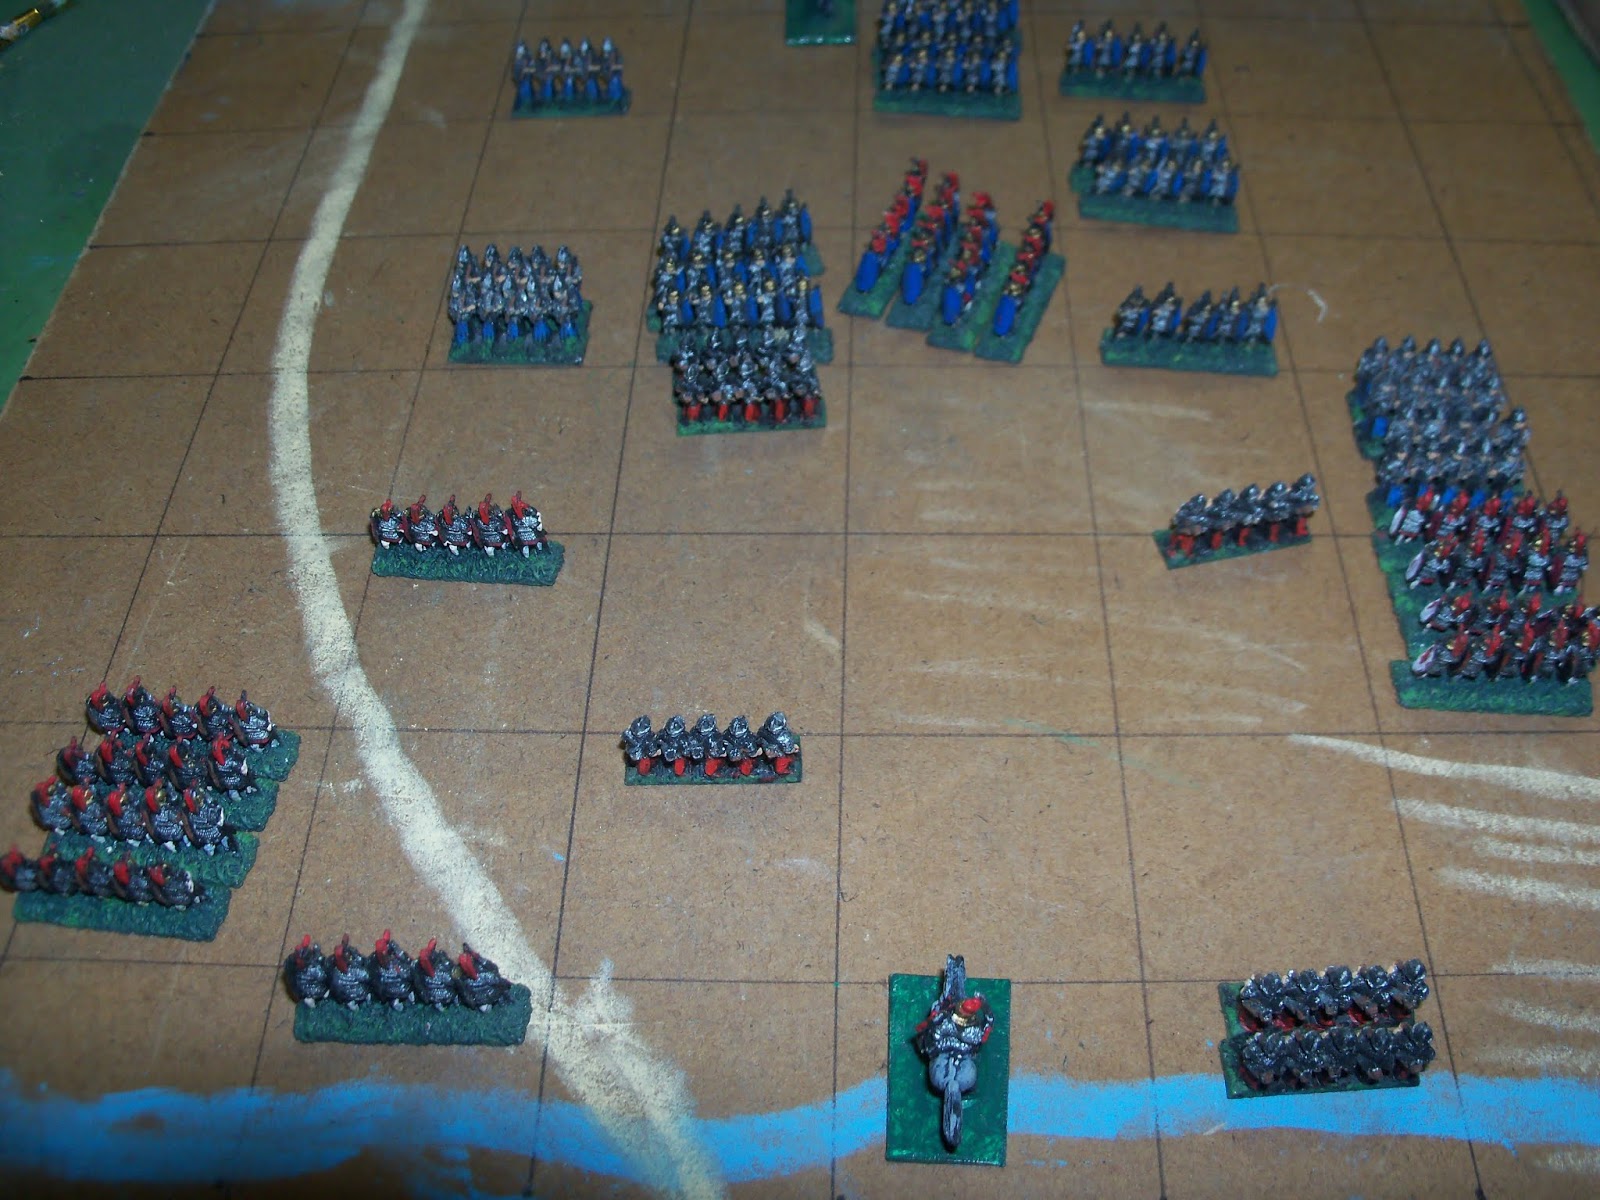
The Sudanese archers on the hill prevented the Arabs near the base of the hill from attacking. The lone Sudanese archer next to them shows where the Sudanese warrior was fighting from. The Arabs surrounding him all battled the warrior; it took at least three turns to kill him. I started taking pictures late in the game.

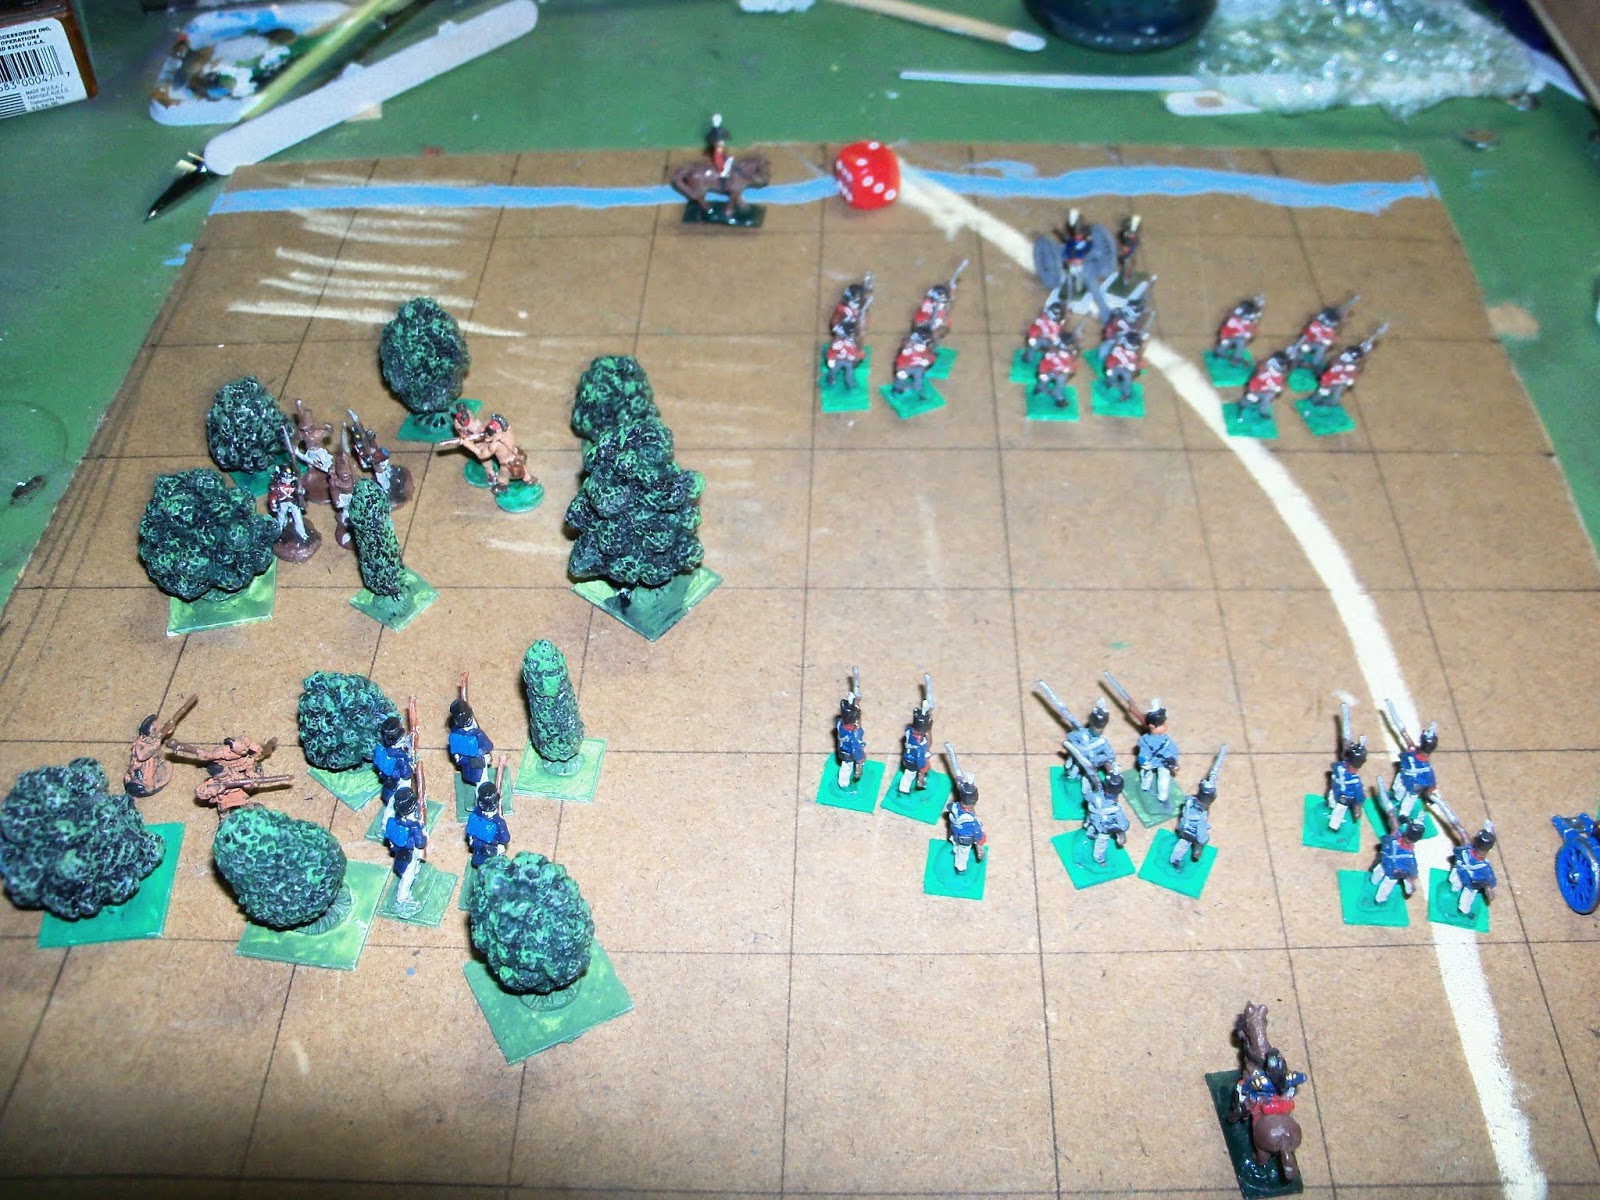
Once it became obvious that the hill wasn't going to be attacked, the Sudanese moved down onto the Arabs flank.


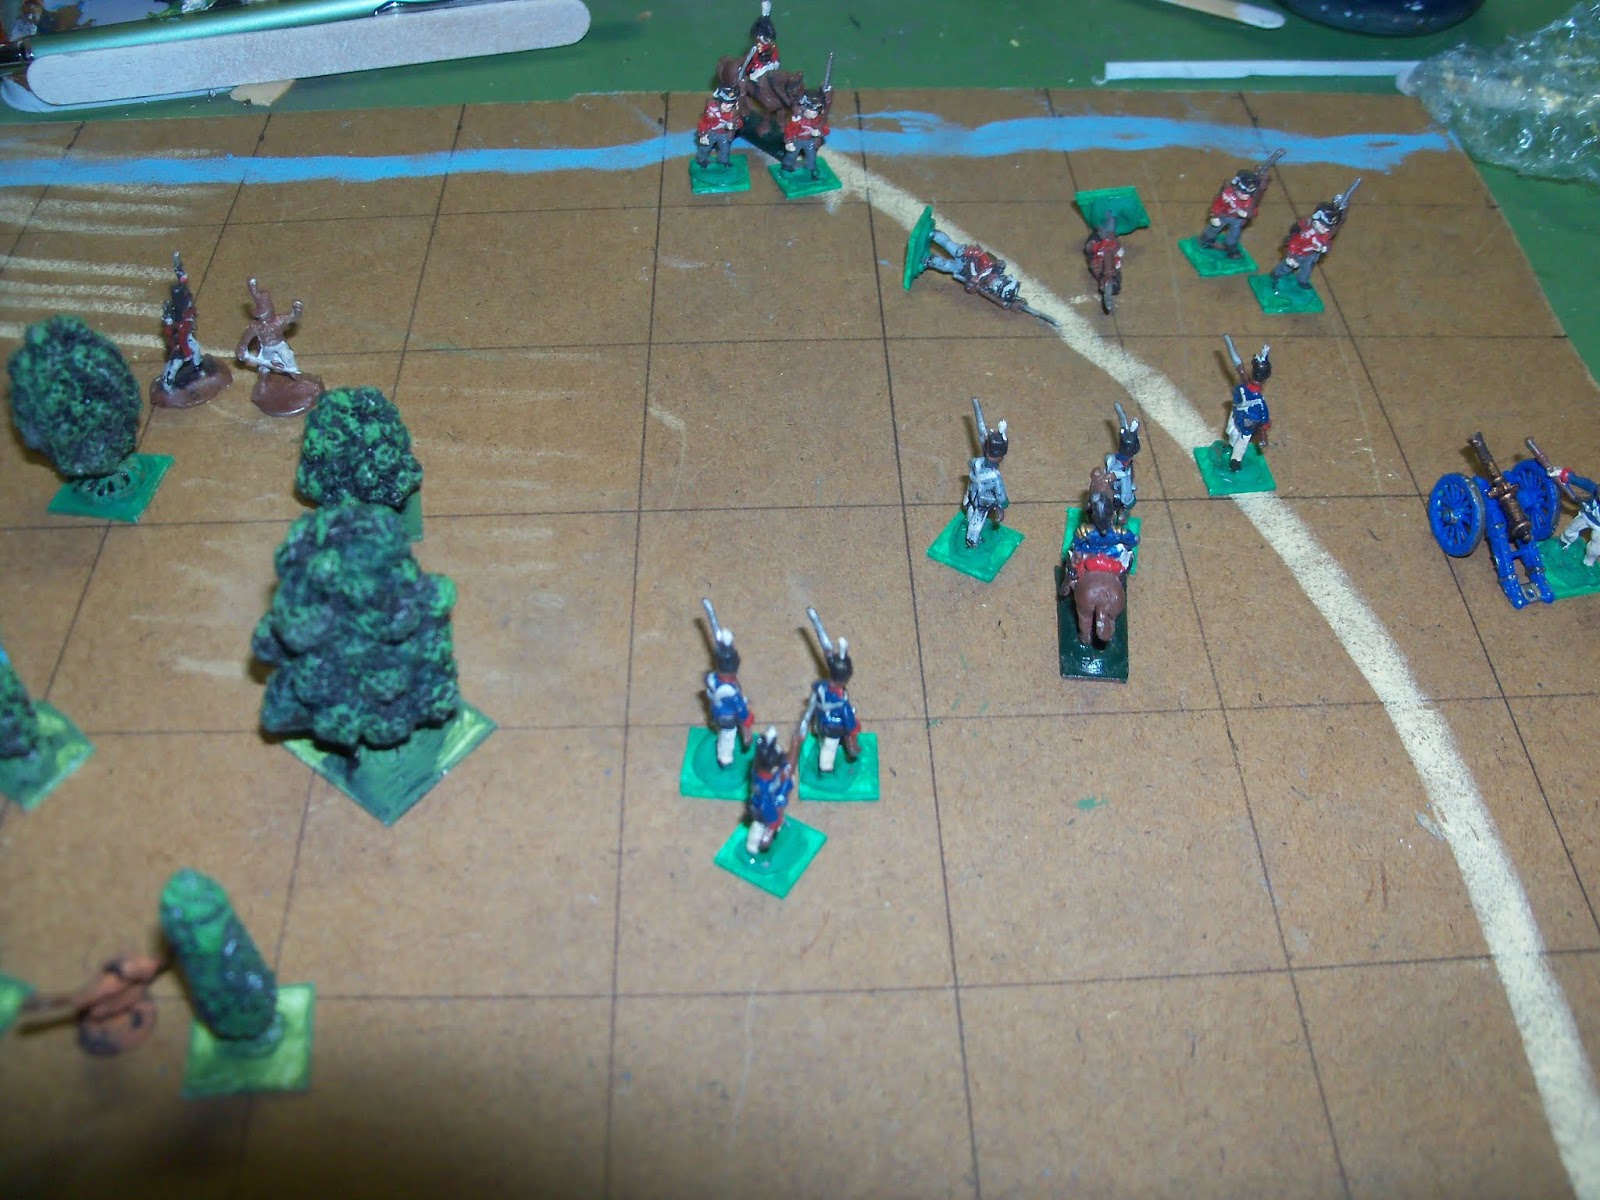
The Sudanese eventually drove the Arab general off the board, thereby winning the victory.

Sunday, December 22, 2019

Plans for Using Peter Laing Ancients

  I have been listening to a podcast, "The Ancient World", which is covering civilizations from the first written accounts to 500BC. They had me thinking of my Peter Laing ancients. Over this weekend I've played several games using No Brain Wargame rules, using several armies and trying some new rules. For now the plan is to stick to the original rules.

     So far the games have had no terrain, but I plan to try  more games with terrain features. I've also dug out a map of Hyboria. My plan is to make up armies for the different regions. Right now my Arab army will be from Alkmeenon, the Sudanese army from Punt, and the Egyptian Army from Stygia. I plan to look through Tony Baths' Hyborian campaign in Battle magazine for suggestions on the makeup of the different region armies.

The last battle fought was my Arab army vs. Normans. The game was advanced by the time I took these photos. Both sides started with 16 spearmen, 8 archers and 1 general.  The Arabs have pushed the Normans back. The Norman general carefully marshaled his archers.

The Arabs hit hard on their left flank. 


The Arab attack pushes back the Norman right.

The Norman archers aim at the Arabs to its front.

They drive back three arabs.


One Arab archer takes aim at the Norman general, but misses.

The Arabs have pushed back the Normans.

The Norman general orders his army to retreat.

Saturday, December 14, 2019

Ancients No Brain Wargame

       The other day I came across some 10mm Old Glory Romans that I got some 20 years ago. I used  them with Chris Salander's H&M2.0 rules that I doctored for the period. They were in a large lot of Old Glory Napoleonics that someone kindly gave to me.
      My wife went out to dinner with some of her work friends last night, so I decided to use these old veterans for a quick No Brain Wargame.  I used average dice to decide how many squares of figures could move in a turn. I started photographing the action after the forces came together; once again I had no plans to write up this battle.

The blue legion (foreground) is hitting the red legions right flank.

In the upper center of the picture, two red units attack one blue unit. At this point in the battle, the red legion is spread out due to blue attacks.

One red unit has pushed forward of the red line, putting itself in extreme danger.

The blue legion hits the red unit in the flank.

The blue attack on the red unit is disappointing; two stands are forced to retreat. What's more, the flanking blue unit is hit in it's flank by another red unit. This attack did no damage to the blue unit.

The two red units are forced to retreat by the blue army; the red general decided to use his turn consolidating his units instead of pressing his attacks.

It turned out to be a wise move. From the left; the red infantry forces back the blue archers.  The red archers eliminate  the blue stand in front of them. The blue infantry destroys one stand of infantry; unfortunately the blue archers score no hits on the infantry to their front.

At this point the blue legion retreats.

This was one of those games that turned out to be more challenging than expected. I don't know if part of it was using figures that hadn't been used in a very long time. It did inspire me to dig out more of my Old Glory 10mm and has me thinking of putting them to use.

Tuesday, December 10, 2019

Battle of Chippawa Wargame

I was looking at a wargame guide I have on the War of 1812 and realized that the battle of Chippawa would make a great, easy to set up game. Both sides had about the same strength, so once again it was easy to make up the armies.  Each side got 3 infantry, 1 militia, 1 Indian and 1 artillery unit. I decided to deploy both sides roughly the way they were in the real battle.


The battle starts on the American left, where the American militia with Indian allies  move forward to engage British forces who had been sniping at the American camp, across the river.

The fighting became brisk in the woods.

The US allied Indians drive back the Canadian militia.

Hearing the increasing volume of fire, the British general leads his army across the Chippawa River.


The Americans start sending reinforcements to back up the militia.


The regulars on both sides start to deploy into line.


The British in the woods start pushing back the American Indians.


The American musket fire forces two British units to fall back.

The British quickly rally, and start reforming the battle line.

The British volleys start shaking the American line.

The British right starts advancing.

The Americans are being driven back to the river; the American militia is also forced back by the British Indian allies.

The American general rallies the American line, and one British unit breaks and falls back towards the river.

The Americans, emboldened by seeing one British regular unit break, starts charging forward.

One American unit overruns the British battery, and the American artillery fire drives back another unit.

The British next move roll is not good; only one unit can move ( each side rolls two dice for movement, and gets the higher roll for movement points). The British general moves the leftmost unit towards the center, to consolidate his line.


The British inflects heavy losses on the American infantry on the road, which  falls back. Meanwhile, the Canadian Indians have driven the American militia off the field.


The American Indians engage the Canadian Indians in the woods. The American line once again moves forward.

The Canadian Indians are finally driven off the field; the British line holds fast...

.. and once again pushes the Americans back.

The Americans try one more charge.

The American Indians drive back the Canadian militia. One British unit is destroyed. At this point the British general falls back across the river to the defenses his army had built before the battle. The Americans return to their camp to celebrate a  battle won, won on the Fourth of July!


Saturday, December 7, 2019

Battle of South Woods: a War of 1812 Wargame

       For this wargame, I used my own army selection chart that I made up. On it there are 10 different possible unit combinations, with 7 different unit classifications. The units are based on Command & Colors, Tricorne units. I also used the terrain selection cards mentioned last posting. I used ideas from 3 different rule sets, and did change some of the rules mid game. If I continue to work on this project, I will have to start writing down the rules as played.

The four terrain cards are selected.

The battlefield layout. After the terrain is put down, I roll for who gets which side, based on what the best  use of terrain would be for the winner. The British won the roll, and chose to enter the field from the bottom of the picture.

The board layout, with the US army on the bottom of the picture. The US army is made up of (from the left) 2 Regular infantry units, artillery, light infantry unit, 1 regular infantry, and 1 uniformed militia unit.
The British at the top, are made up of (from the left) 1 militia unit, 1 regular infantry, 2 uniformed militia, artillery, and 1 regular unit. Uniformed militia are equal to Provincial infantry in C&C,T. I see them as better trained militiamen.


After the first move.

The American light infantry moves ahead of the army and enters the woods. The British uniformed militia also enter the woods.

The militia in the woods get on the flank of the US light infantry and kills one; one of the regular infantry units comes under the British artillery and loses one man.

The US light infantry drives back one militia unit.

Closeup of the above picture. At this point I made a mistake. using C&CT unit rules, this unit should have retreated two spaces. Of course, being a game to feel out rules, it was to be expected.


The British kill another light infantryman, and  drives the artillery and one infantry unit back.

The British lose two more uniformed militiamen from the fire of the light infantry. The British also lose two more infantrymen and a gunner. A US regular unit moves up to support the light infantry.

The uniformed militia in the woods moves behind the light infantry. The light infantry is eliminated in the crossfire. Meanwhile the regulars come under British artillery fire and loses a man.


On the US left, the British militia turns and runs (using the C&CT rules, militia retreats three spaces for each flag rolled.) The regulars enter the woods.

The Americans now attack the uniform militia unit. The British general was with this unit. I rolled one flag and one crossed swords. The militia retreated off the field. I decided to roll another dice; if crossed swords came up the general was killed. I rolled crossed swords! The British militia on the American left was forced to retreat again. In most C&C games if a unit reaches it's back line and still have to retreat, they lose one man for each space it can't retreat. For me it seems the militia would just keep on retreating, so that's what they did.


The British now concentrated their units towards the woods, and caught the infantry in the woods  between three fires.

The Americans were driven from the woods.

The British now form a line in the woods.

The Americans attack the woods. The uniform militia pushes their way into the British center. Meanwhile, the British militia loses two more men. 

The British catch the militia in a crossfire, and pushes them out of the woods and also off the field! The British rolled two flags; uniformed militia retreats two spaces per flag. 

One British unit moves forward, and catches one regular unit on the flank. The unit is wiped out.

The Americans attack the woods and kill another militiaman.

The Americans drive the militia out of the woods.

The British counterattack and kills two infantrymen.

At this point the British holds the woods. The next initiative goes to the British. The Americans break off their attack and retreats.                                                                                                                                                              

This game was played in the bedroom near the window for natural light.  If I continue with this project, I am going to try to narrow down the number of units. On my chart now there are 7 different units. I am thinking of consolidating Light Infantry(and Indians) and rifles; and uniformed militia and militia. If light infantry or militia is chosen, perhaps dice rolls would decide what kind of units they are. I am looking to make a smaller chart. My current chart has 10 different unit combinations. These combinations were just thrown together with little thought of balance.
I also ran into the problem that I didn't have figures for some of the chosen units. I ended up using some of my 1st generation AWI Minifigs. Once again, if this project goes on I will need to paint up more units.