Monday, October 28, 2013

15mm Peter Laing Hadendoa Figures


On one of my earlier posts, a writer commented just recently on how he would like to see Peter Laings manufacture again (wouldn't we all!) and how he has no Peter Laing Hadendoa tribesmen.  As I only have around ten of the figures myself, I feel for him.

Sunday, October 27, 2013

Peter Laing Hyborian Battle

      Going with the idea of using Tony Bath's Hyborian campaign with Battle lore, I dug out my old copies of "Battle" magazine which has a continuing series of the Hyborian campaign. The first in the series  had a good map of Hyboria. By using this map and Horde of the Things list of Hyborian Armies, setting up battles with a purpose becomes easier. By using this idea, the last battle report involving  Crusaders verses Muslims becomes the army of Zamora fighting and defeating the army of Zuagir.
        Going farther along this line, it becomes easier to come up with a narration of the cause for battle.
The Zuagirs, being a nomadic people, are not above raiding their neighbors. What's more, a drought has been devastating eastern Hyboria, leaving the Zuagir people in the state of starvation. So now the raids have an even greater purpose. Prince Asfar of Zuagir  is ordered by his father to lead a raid into Zamora to find livestock and other foodstuffs. As the previous article showed, the Zuagir raid failed.
        If the situation wasn't so desperate, the Princes life might be in danger. However, the needs of the people outweighed the wraith of his father.  After much debate, it was decided to raid Vendhya.  While the empire of Vendhya has a large army, it is spread throughout the empire and the majority of it are militia levies.  A fast strike and they might not even have to battle the Vendhya Army. However, Prince Asfar decides to bring a unit of heavy armored camels just to be on the safe side.
       At first all goes well. The Zuagir raiders send large amounts of captured livestock back to their waiting tribe. But as the Zuagirs go deeper into Vendhya they noticed they were being trailed by scouts. It soon became apparent that the Vendhya Army was trying to get between Zuagir Army and the border. By the time Asfar decided it was time to withdraw, it was too late.  Every attempt to outmaneuver the Vendhya Army failed, so Prince Asfar resolved to attack it before more reinforcements arrived.
       The Vendhya Army draws up between two rivers, with units on the other side of each river to guard the flanks and possibly work around the Zuagir flanks.  For Prince Asfar this is good as it narrows the Vendhya frontage so it evens up the engaged units. While the rivers are fordable because of the drought, it will be easy enough to catch the enemy in the river at a disadvantage.
The Vendhya Army at the top of the battlefield with units on both sides of the rivers. All their units are light, except two infantry units and one cavalry unit, which are medium units. The Zuagir  Army on the bottom of the field. Most of the Zuagir infantry is medium. The cavalry is made up of 3 light cavalry units, one medium camel unit and one heavy armored camel unit.  Victory goes to the army which inflects 50% casualties to their opponent. The Vendhya Army has 16 units, the Zuagir Amry, 12 units.

A look down the Vendhya Army line.

A look down the Zuagir Army line . The unit of armored camels are in the rear  for reserve.

After the first couple of moves. The Zuagirs push forward their medium infantry in the center. The Vendhya forces on the opposite banks push forward to threaten the flanks of the Zuagir Army.

The battle from behind Vendhya lines. In the upper left of the picture the Zuagir archers keep a watch  on a Vendhya light cavalry unit. In the right center of the picture the medium infantry units slug it out, inconclusively.


Two units from Vendhya try to cross the river. A Zuagir archer unit holds the high ground to hold them off.

Two Zuagir light cavalry units slam into the Vendhya right flank, forcing it back. Notice the Vendhya light infantry unit starting across the river at the top of the page. At the center left of the page a Vendhya light cavalry unit had crossed the river, only to be forced back by the archers on the hill.

The Vendhya archers that were in the river now come up behind the Zuagir light horse. Their fire comes up with a "retreat" throw. If a unit cannot retreat back (they are blocked by the other Zuagir light horse) they must lose one piece.

Meanwhile on the Vendhya left flank the Zuagirs had advanced their other light horse and medium camel  to try to break the stalemate in the center. This picture shows after the advance of the Vendhya medium horse. They have routed the camels (2 retreat dice), that can be seen retreating up the valley.The medium horse then uses it's pursuit to hit the light horse,  inflecting 2/3 loses on it.

General Mirgol of the Vendhya Army now starts trying to turn the Zuagirs right flank, pushing forward all his troops on that flank. Notice the Vendhya horse blocking the valley to protect against the camel unit.

This picture shows after a particularly brutal fight. The armored camels came around the other side of the hill on the right of the picture. It inflected 2/3 casualties  on the medium horse and forced it to retreat. It then hit the light horse unit, wiping it out. However, the Vendhya medium horse counter attacked and caused 2/3 losses on the camels. The archers (at the left of the photo) then finished off the rest.

The Vendhya forces back one Zuagir light horse unit and cuts off the other light horse unit, which was shortly after dispatched.

At this point in the battle each side only needed to take one enemy unit to win the battle. The Zuagir medium infantry was just going to force the Vendhya light infantry off the field for the victory. Notice the two man Zuagir infantry unit, with the light horse right behind it.

This is a photo of the Vendhya infantry unit that won the battle. It spent most of the battle standing in the middle of the river. However, with the center of the army collapsing, they charged out of the river and hit that Zuagir medium unit in the flank, hoping to at least force it to retreat. However, it's roll came up with two "medium" hits, wiping out the unit and carrying the day!

Wednesday, October 23, 2013

HUMP DAY! Celebrating with 2 new Peter Laing Camel Figures

      Finding Peter Laing figures for sale in the U.S.A. is a rare thing. Last week on Ebay there was a lot of colonial British figures. There were only individual figures, most of which I already have. It looked like it was a sample pack which didn't live up to the buyers' expectations. I almost didn't bid on it myself, except the fact there were two camel figures; one of a British Camel Corps figure and another of an Egyptian Camel Corps figure. I plan to save the figures to use at a later time for mold masters.


I am finding my near obsession with Peter Laing camel figures quite disturbing!

Saturday, October 19, 2013

Future Plans for my Peter Laing Ancients

       While using the Battlelore game with Peter Laing figures, I started reading a book called Battles of the Bible.  It has me thinking of a war-game along the lines of Tony Bath's Hyboria campaign. The book tells of the different city-states in the middle east that were sandwiched between two large empires; and how it became a battleground as the empires fought for supremacy.  I have a large collection of Peter Laing Assyrians, Greeks and Persians. I also have smaller lots of various ancients. With the smaller lots of figures, I can see them acting as the bodyguards for the kings of the city-states.  To build on their armies, they would hire companies of mercenaries.  Of course the more numerous Assyrians and Persians will form the large empires.

       While Battlelore is a good set of rules, how to use elephants and chariots? Of course by using another set of Richard Borg's rules; Command and Colors Ancients.  However, the game is quite pricy; all I want is the rules. The main part of the rules I need are movement and battle rules.  Luckily the rules are on line so I can get in information I need. So the Peter Laing elephants will see battle again.

Friday, October 18, 2013

Newest Peter Laing Recruits

There has been a lot of Peter Laing Persian figures on Ebay for  a few months  that was quite pricey.  However, with my renewed interest in ancients and medievals, and that the lot had 3 figures I don't have yet, I broke down and purchased them.
Persian horse Archer.


I have no idea what this figure is.


A Sassanid Persian Clibanarii?


This one I know; a cow (or is a bull?)

This trebuchet I actually got from Ian Dury, who gave me several siege engines. What's great about this  piece is it actually works! Put a piece of ammo in the arm and tap the counterweight and it throws the ammo! Get a couple of these and you could have an ancients Little War.

Thursday, October 17, 2013

Experimenting with Battlelore Rules

I have been seeing a lot of promise using Battlelore systems for fighting wargames. By using Peter Lanig figures with Heroscape scenery, my interest in wargaming has been renewed.  How to come up with armies was proving to be a problem.  At first it seemed just using Hordes of the Things armies seemed to be the way to go. HotT uses a point system, where different units used up  a certain number of Army Points (APs). However looking at the rules, a strong unit such as knights cost 2 AP;  but light units such as archers also cost 2 AP.  But by using the system in Table Top Battles, A unit such as knights had a higher AP than archers. I decided to use this point system with Battlelore.
    Instead of using the same Agincourt scenario, I chose another one from the scenario book and made up two armies using the Table Table Battles point system. The armies were a Crusader army, with an a Muslim army to oppose them.The Crusaders used half their points on mounted knights supported by men at arms and two archer units. The Muslims had mainly light troops. The Muslim army was a Peter Laing army that I really wanted to use. However, there wasn't enough figures to provide for a 24 point Muslim army so both armies only had 20 army points. The first army to lose 50% lost the battle. The Muslims had 11units; the Crusaders 8 units.  I once again used my movement dice to decide how many units could move.

                                                                                                                                                                                                                                                                                                                                                                                                                                                                                                                                                                                                                                                                                                                                                                                                                                                                                                                     
The Muslim army is on the top; Crusader army on the bottom.

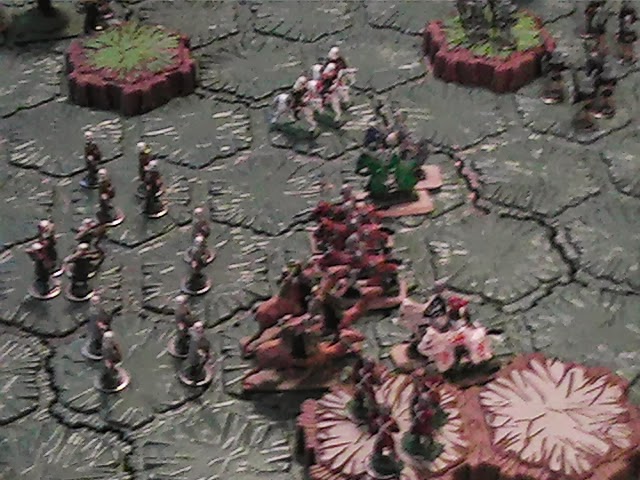
Once again, looking down the battlefield with the Muslim army on the left and Crusaders on the right.

The Muslim infantry advances. By advancing in this formation, all the units are "supported", meaning in battle they are considered "bold" and can ignore one retreat dice and have the opportunity to battle back when attacked.

The knights attack and inflects losses, but the infantry being supported, hold firm. The Muslim camels advance to attack.

The Muslim cavalry hits the knights' flank.

The knights break through the Muslim center.

The Muslim light cavalry eliminates two of the knight units.

As the battle wore on, the last knight unit lost two knights. The light Muslim cavalry forced it back two hexes and followed in pursuit.

The knight unit rallied and pushed the Muslim light horse back. In the pursuit, the knight unit eliminated the light horse.


The battle came down to the Muslims having lost 5 units, the Crusaders 3 units.  The Crusaders managed to defeat the Muslims, 6 units to 3, but the battle could have gone either way.

This battle has me thinking of the possibility of a campaign along the lines of Tony Bath's Hyborean campaign.

Saturday, October 12, 2013

Another 15mm Peter Laing Medieval Battle

      The second battle of Agincourt was fought using 15mm Peter Laing figures on Heroscape terrain.  It was a fun game. The English plan to move their forces to the woods never took place, which  led to their being beaten soundly.
      I still wanted to try using the Battlelore battle rules and movement, but instead of using the movement cards, I decided to use my movement dice.  It is for a set of rules that each side moved 4 units per turn . To fight solo battles, I made a dice that has one 3, three 4s, one 5, and one 6 on it.  That way you never know how many units you'll get to move on the next turn. So once again (and for the last time for a while) Agincourt was fought again.
    This time the battle was a close run thing. The English made more use of the woods, thereby cutting down the French attack strength. In the end the English carried the day, taking 5 units to the French 3. Here are some photos of the action.
English army on top of field, French army on bottom.  This time I got the armies on the right side of the field.

The French Knights wait to attack.

The French knights attacked by two units of English archers. The French men-at arms trail behind.

All the French Horsemen push forward. The English prepare for the onslaught. With Battlelore rules  if three units group together (think of like a triangle) they are supported and considered "bold", which allows them to ignore the first "retreat" dice. They can also "battle back" if not eliminated or forced to retreat. Another rule I forgot to play this game!

At this point the French cavalry is pushing the English back and causing heavy losses. however , they do not eliminate any of the English units.

The English counterattack, wiping out one French cavalry unit and pushing the others back.

Th French starts pushing forward their strong force of men-at-arms. The English  move towards the woods for protection.

As the main part of the battle takes place in the center, two English archer units on the right flank close in on a lone unit of men-at-arms and eliminates it.

Just about all of the English heavy infantry has been lost. But the French men-at-arms  have also suffered great losses. As the French try to close in on the last of the English foot knights, the English archers sally forth from the woods. They break the attacking French and win the day!

A view from the English right flank. The three units closest to the camera are English units.

Now to work on a way to build armies based on a point system, such as the system used in "Hordes of the Things".