I said recently that it might be time to do a post on my mold making. Here it is.
In the past, I decided that if figures I wanted can be bought, I would save myself the work of casting my own. With my recent work on SAE 30mm Civil War figures, my collection has no cavalry ready for use, although I have several that are broken off their bases. I went to the Spencer Smith website, but they didn't have the figure I really wanted for my project. Also, right now money is tight. As I have the rubber to make my own mold and the figure I wanted, my plan was to try to join the two pieces as close together as possible and hopefully carve any rubber off to unite the two pieces.
 |
| The master placed in clay. Try to find the original mold lines and follow the same. The keys are made by sticking a paintbrush into the clay and rotating it to make a cup shape. For the box, I used. two pieces of "L" shaped metal for the box. As can be seen, it is easy enough to make the box larger or smaller. Some people use Legos to make the box. |
 |
| Aeromarine 125 2 part RTV silicone rubber. It's easy to measure, as it's measured 1:1. |
 |
| I have learned to measure A first, then B. I use a tablespoon to measure it. Usually I use 3 tablespoons of each for molds. As this mold is larger than most, I upped it to 4 tablespoons. |
 |
| Pouring the rubber into the mixing cup. The cup is easy enough to clean. Just wait for the rubber to set then peel out the dried rubber. |
 |
| After getting the rubber measured out, then stir until it's a uniform color. |
 |
| I usually drizzle in some of the rubber into the keys so as to stop air pockets from forming. |
 |
| I drizzle the rubber over the figure, then work the rubber around the figure. I wait a couple minutes, letting air bubbles pop. |
 |
| Then slowly pour in the rubber. |
 |
This rubber cures in 8 hours, which speeds up the mold making process. If there is rubber film where there shouldn't be, gently cut the rubber and remove the film. I then cover the exposed rubber with petroleum jelly. I use an old paintbrush to work the jelly in. This is the mold release. Then repeat the above process.
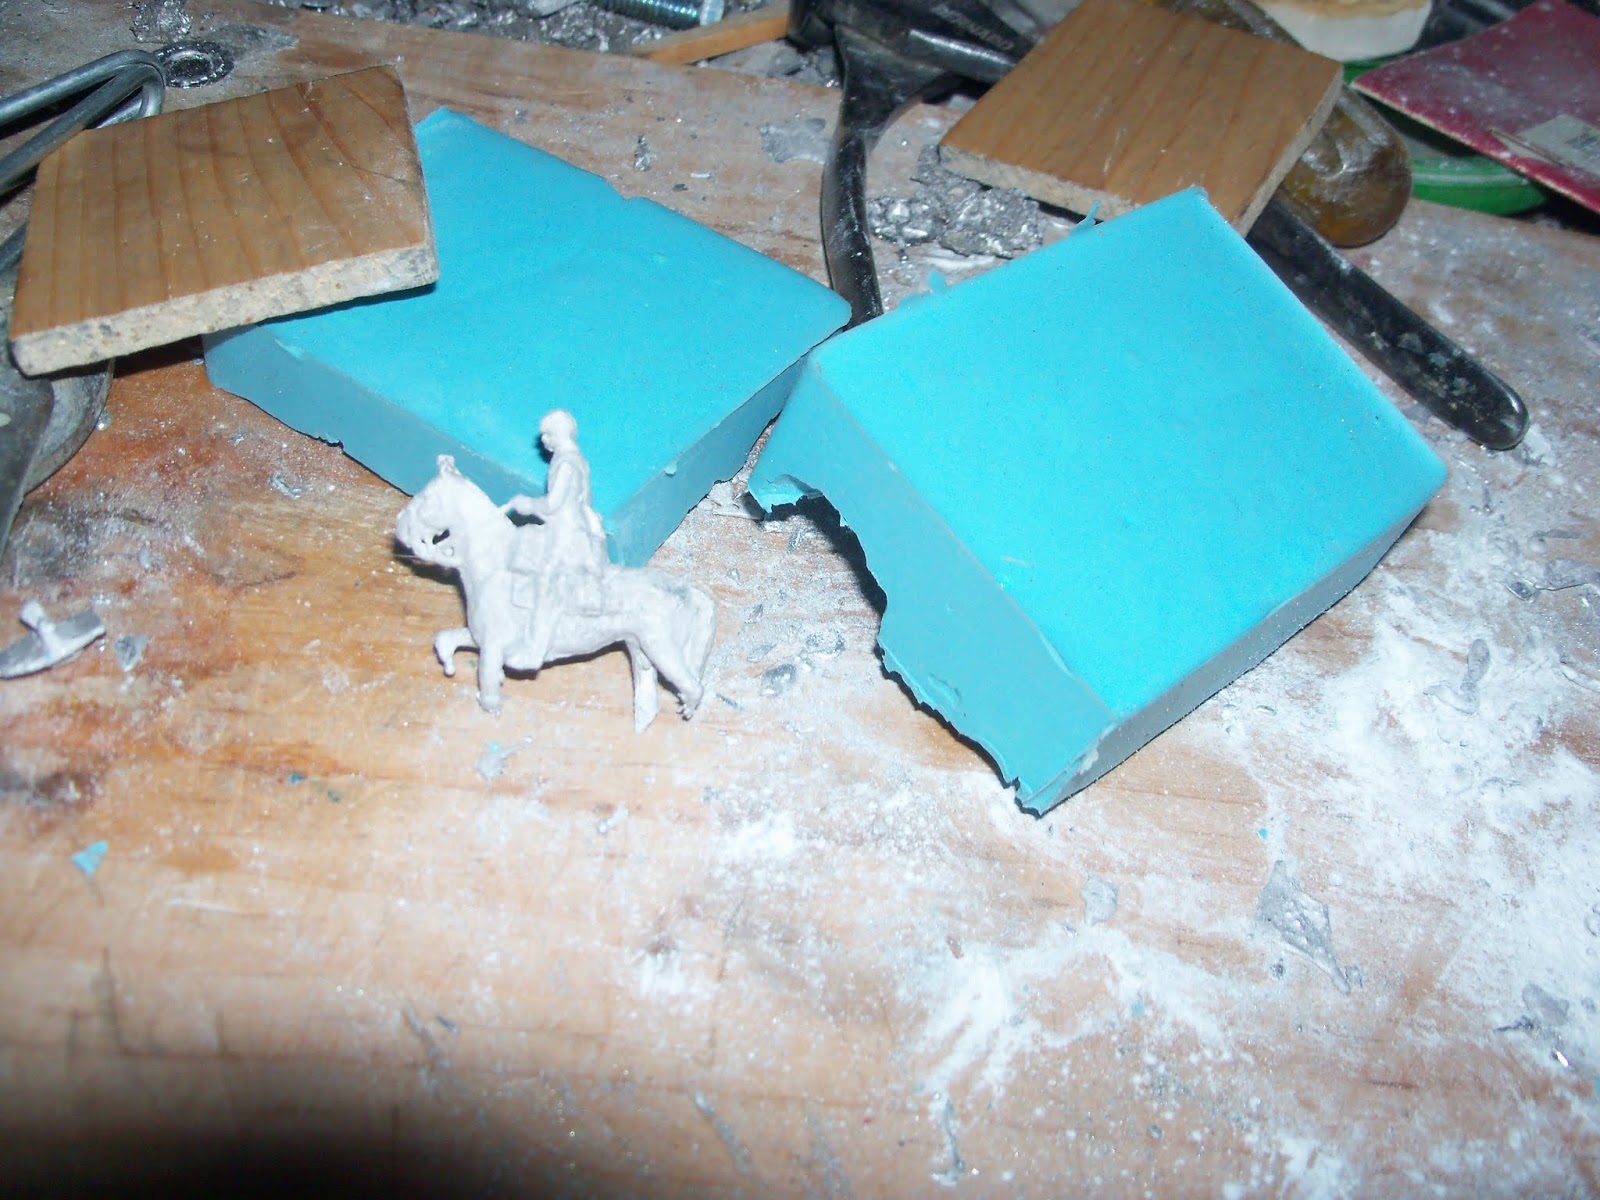
I would love to say it produced the figures as planned. However, I couldn't get the mold to work right, and so the mold isn't a success. I have decided to order the figures from Spencer Smith, even if they're not what I wanted. I did make another mold, which was more successful. I will show more on that later.
|
 |
| After several attempts at making the mold work, I still was unable to. I wasn't going to show this, but the reality is not all molds work as you hope. |


That last line is sooo true!
ReplyDeleteLooks like everything down to the horses knees worked well.....
Perhaps I should mount them so they look like they're crossing a river.
ReplyDeleteA really useful post thanks... I hope to have a go at making moulds soon.
ReplyDeleteI feel your pain. It is many years since I made a mould, but had similar experiences with horses. I found sitting them at an angle and venting the base helped.
ReplyDelete